Monday, July 31, 2017

DC Update and Emmons/Winthrop Merge Navigation Tips

There are a few notable facts about the DC route in it's current incarnation:
  • You hit the 12,400' elevation band 4 times while climbing up and down the route.
  • Total distance is almost 8 miles from Camp Muir to the summit and back.
  • There is a 300' descent and subsequent climb in the middle.
  • You begin the climb heading due North and reach the summit travelling due South.
  • You will cross 4 glaciers en route, the Cowlitz, Ingraham, Emmons and Winthrop.
DC Route on 7/30/2017
The trail above the Cleaver is good but the route is quite long. Most of the climbers on the July 29/30 weekend reported that they underestimated the physical effort required to tackle the DC. The climb back from southern margin of the Emmons Glacier to regain the Cleaver seemed to be the area that gave folks the most trouble. Regaining that 300' in the heat of the day can be extremely taxing. You can mitigate this by climbing early on hot days and by maintaining a consistent pace throughout your climb.
The DC route traversing to the north and gaining the Emmons Gl.


Finding the correct descent route hasn't been as much of a problem this week as it was last week but here's a few tips on successfully making it back to your camp.

#1 Carry a GPS and track your progress. You can then simply reverse your path. The rangers do that and it's how we produce the track logs used in this blog.

#2 Check your compass bearings on ascent and descent. The general direction of the DC is SW. The Emmons/Winthrop is NNW.

#3 Use large, obvious landmarks to keep you on track.

Climbers descending the DC and heading towards Little Tahoma.

#4 At the very least note and remember critical points on the trail.
The DC and E/W Merge from above. The path leading straight down heads to Camp Schurman, the path to the right leads to Camp Muir.
Climb safe and have fun!

Saturday, July 29, 2017

Inter Glacier

This unusually long stint of beautiful hot sunny weather is melting the snow on the glacier fast. When you get near bottom of the snow line be sure to try and minimize your impact by not hiking on the alpine meadows that are starting to melt out. You can still stay on the snow all the way to the social trail, or you can rock hop your way over to it. Also, beware as you walk where the snow is thin at the bottom, it is easy to punch through and twist an ankle in the rocks just beneath the surface. 


For those of you looking to ski, come in with very low expectations or just don't bring your skis/board at all. There is a fine coating of dirt covering the whole glacier that will clean the wax right off your bases and large sun cups forming near the top half to make the skiing less than fun. But if you are just looking for those 5-10 turns to tell folks you skied July and August, it is possible.


On that note though skiers, hikers, climbers, and glissaders should take care traveling the Inter Glacier. While it is not high on the mountain and as big as the glaciers up above, there are crevasses you don't want to fall into. Some of which are hard to see from above because they are below roll overs. Guided groups travel the glacier roped up and if you are not very experienced with glacier travel, you should consider the same for yourself.  Some of the boot tracks and glissade tracks go right next to large crevasses, right on thin bridges. So don't blindly follow the boot tracks or fly down the glissade trenches. And ALWAYS stay in CONTROL when you are glissading. I recommend just not butt-glissading at least the upper half of the glacier. It's hard to see what's coming up. 


Glissade trench going right over a thin bridge above a large crevasse

As the snow melts out too, take caution as you approach some of the large rock outcroppings in the glacier. It is not uncommon for large moats to form around the rocks from the heat they radiate back at the snow. It would not be good to fall into one.

On the brighter note though. It is really nice conditions right now for hiking up and down hill. Firm in the early morning, easy to kick steps in the softening snow by late morning, and generally by late morning/early afternoon it soft enough to be gentle on the knees on the way down without post holing through. For those of you into boot-glissading it can't get much better.

Friday, July 28, 2017

Glissading 101

The Basic Rules

It's fun, fast, and efficient way to get down, I can't deny it. However, as the rangers patrol the mountain, we've seen a number of golden rules broken. Some with minimal consequences and others with more severe from lost gear to damaged joints. So here's a few basic rules to follow when you are glissading that can make your descent a safe and fun success.

1. Look at your line. Are you on a glacier right now? Generally a bad idea to be sitting low to the ground, moving fast if you might have crevasses coming up. Even the inter glacier has some good size holes just under a thin bridge or past a blind roll. Just because there's a trench from previous glissades, doesn't mean it's a smart or safe line to follow. Really for areas like the inter glacier (if you have chosen to travel it unroped), you might want to consider mastering the more difficult "boot glissade" technique so you can better see what's in front of you. I think it goes without saying, but don't glissade on the upper mountain and while roped up. Of course, it's good to also check and make sure rocks and alpine vegetation have not melted out in your line as well.

2. Take your crampons off before glissading if you value your knees and ankles. It's easy to catch a point when your going fast and next thing you know you flipped around to be flying down face first with a sprained or broken ankle. 

3. Have your ax ready and know how to self-arrest. On steeper pitches, it's easy to get going faster than you mean to or expect. Make sure you can stop yourself fast so the rocks at the bottom don't. 

4 Keep your pack tight and clean. A lot of gear has been popping up in those glissade trenches. It can leave you rather thirsty when you get to the bottom and find your water bottle gone. Or even worse, when the one strap that was holding your tent (or part there of) to your pack breaks, and you get to the bottom without your $500 shelter. If it looks like you're having a tag sale of gear on your pack, it's likely to become a yard sale on the mountain when you glissade.


Edmunds Headwall/ Mowich Face Route Conditions

Ptarmigan Ridge, Mowich Face, and the route taken up the Edmunds Headwall
On July 25th, two Climbing Rangers set out on a patrol from Mowich Lake toward the Edmunds Headwall.  The routes on this side of the mountain require a long approach and a high degree of self-sufficiency given their remoteness. Rangers were able to establish a bivy at 9,600 ft in between the North Mowich and Edmunds glaciers near the base of the Edmunds Headwall.  The bergschrund is not passable anymore, but rangers found a way climber's left near a twin gendarme that allowed access to the face.  The bergschrund under the central Mowich face appeared to have a similar bypass through a rock band on climber's left.

The Central Mowich Face from the Edmunds Headwall
 Once on the headwall, rangers found moderately firm neve conditions that allowed for efficient movement.  The entire face is covered in penitente from Sunset Ridge to Ptarmigan ridge.  This textured snow provided ample footholds and nearly eliminated the need for front-pointing.

Ranger Hicks surveying the route
After completing the steepest climbing, and arriving at 13,000 ft atop of the headwall, rangers traveled along upper Sunset Ridge towards Liberty Cap.  Here, they waded through 3 foot tall penitente that made travel arduous.  With ice axes wielded like machetes, they spent considerable time finishing this stretch of the route.

Penitente below Liberty Cap
Climbs on the Mowich Face are exposed to rockfall. Climbing in the morning before the sun hits the face can help mitigate rockfall potential, but this will not eliminate the hazard.  Climb with a helmet and bring ample rescue gear.  Always be prepared for an extra night out on the mountain, and don't be afraid to turn back if climbing conditions are not ideal.  Have fun and enjoy the mountain!    -691


Weather Ed- Cloud Caps and Lenticulars

The presence of a cloud over the top of a mountain such as Rainier makes for a great photo op for anyone who happens to see it from below; for climbers high on the mountain however, these clouds and associated winds can represent quite a challenge  In this short overview we want to look at the fundamentals of how these clouds form and what the implications are for climbers.

Aug 2016. Flow is from left to right

There are two basic mechanisms that we will discuss.  Keep in mind that these processes are come with respect to any large isolated mountain or mountain range.  First, we will look at the generic mountain cloud cap which is produced by the forced ascent of air up the windward slope of a mountain.  Then we will discuss the various types of lenticular clouds (lens shaped) which form in the crests of mountain waves.

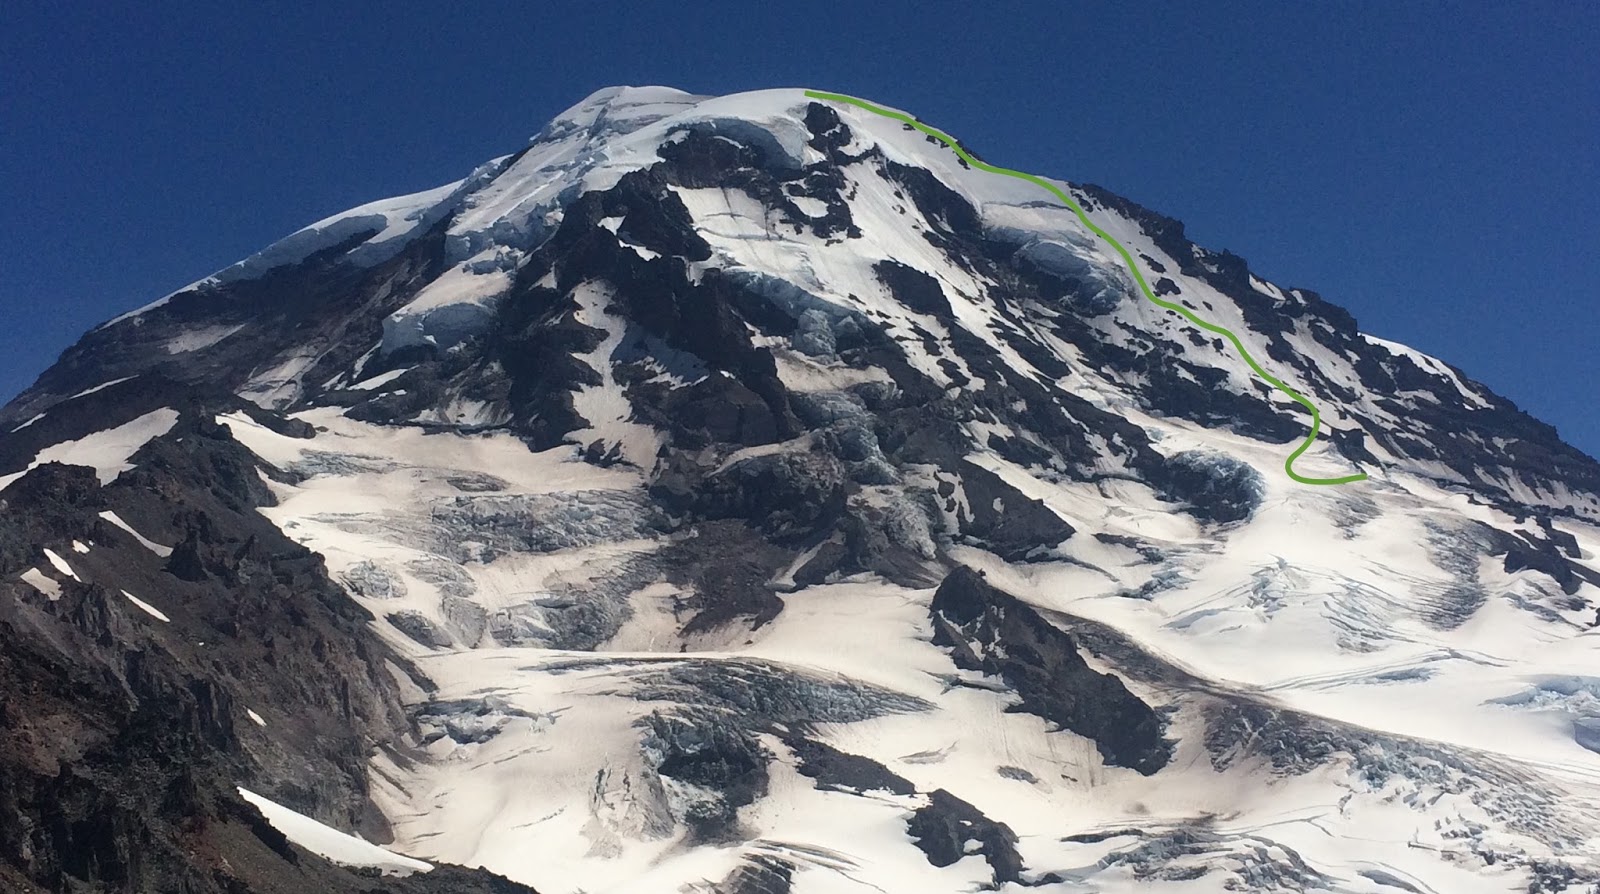
We are going to start our discussion with a thought experiment.  Let's say we have 20 mph west winds at 10,000 ft approaching Rainier (approx. upper Puyallup Cleaver-Tahoma Glacier).  Note that wind direction is the direction from which the air is moving; in this example from west-to-east. What the possible flow patterns once the air reaches the mountain? It would seem pretty obvious that the air can go up, down or around the upper mountain.  Under most circumstances (standard atmospheric properties) this air would have a difficult time moving down because it would be moving in to an area of higher pressure. Computer modeling studies of this nature show that part of the flow will go around a conical mountain like Rainier and some will go up and over (keep in mind that these flows may accelerate as well).  The breakdown of how much goes over versus around depends on a number of factors chiefly, atmospheric stability which in turn is a function of the vertical change in air temperature with height.  Without going into any more detail, it will suffice to say that the portion of the flow that is 'forced' up and over cools as it ascends. It cools because it expands into an area of reduced pressure hence the kinetic energy of the air molecules decreases (there are fewer collisions between the air molecules which is what we measure as temperature).  The rate of cooling various a bit but typically ranges from 3 to 5 degrees F. per thousand feet.
Upslope flow from left to right.

If the air which ascends the windward slope contains only a small amount of water vapor (invisible to the human eye but is in the air nevertheless), then the cooling will probably not be sufficient to produce a cloud (the relative humidity [RH] remains below 100%).  However, if the ascending air is moist to start with, as soon as the RH equals 100% cloud droplets or ice crystals form and we have the makings of a cloud.  It is important to keep in mind that air is continuously moving through the cloud and that the cloud droplets (or ice crystals) are continuously condensing (deposition= vapor to a solid directly) and then evaporating (sublimating= solid to a vapor directly). Even though the cloud essentially remains fixed with respect to the mountain, the stuff that makes up the cloud is in a constant state of flux.  This upslope flow produces a cloud directly over the summit and not above it or downstream.

So what happens as the air moves past the summit? Generally, it will start to descend the leeward slope; as it moves downward it is compressed and hence it warms (kinetic energy increases).  As a parcel warms with no change in its water vapor content the RH drops below 100% and the droplets (crystals) begin to evaporate (sublimate)- this is the trailing edge of the cloud.  The shape of a mountain cloud cap as seen from below is often symmetrical with respect to the leading and trailing edges but they don't have to be (photo above shows an asymmetrical cloud).  Sometimes the edges are smooth and other times ragged.  Flow around the sides of the upper mountain may produce some additional clouds as well.  Cloud caps form and dissipate over the course of a few minutes and their duration (summer) is typically on the order of half-hour to hours.  During the winter these may last for days during the passage of a storm.
Massive outbreak of lee waves.

Lenticular clouds on the other hand are produced when a wave in the atmosphere is generated by the flow of air over the summit of a mountain, ridgeline, or mountain range.  This occurs in response to a fairly narrow range of atmospheric parameters hence they only develop from time-to-time.  In short, energy is produced by air moving over the summit which is then transmitted upward through the atmosphere.  Depending on the change with height of air temperature, windspeed and wind direction, this energy may be transmitted well into the stratosphere (miles above the source region), the result is a single wave above the mountain.  At other times, a 'wave guide' may form in the atmosphere in which case a large part of the upward energy is reflected back down towards the mountain.  If these two waves are in phase they will superimpose creating what we call a standing wave.  Air is constantly moving through the wave yet the wave itself moves very little with respect to the mountain.  One might be tempted to think these are the same as oceanic swells- in fact they are not.  In the ocean case, wave energy moves horizontally while the water is only displaced vertically, hence the swell from a tsunami can travel 400-600 mph in deep water because only the energy is being transmitted long distances not the water.  In the atmosphere the air is primarily moving horizontally while the energy moves primarily vertically.


Gossamer cloud morphed into much larger cloud cap within an hour.

Standing waves are generated individually or in a group; they may form above the summit, envelope the summit or downstream of the summit (standing lee waves).  When they occur as a group the horizontal wavelength is often on the order of 3-10 miles.  It is one thing for a wave to form it is another to be able to see it.  Lenticular clouds form in the crests of standing waves if there is an abundant supply of water vapor.  This is essentially the same process as occurs in upslope flow over the summit; in this case the wave 'forces' the air to ascend and then descend.  Clouds that form in the crests of these waves (lee wave clouds) often have a very smooth appearance, sometimes they are 'stacked' on top of each other leading to some dramatic images if you are in the right place at the right time.  Sometimes wave clouds show some additional smaller scale features within the primary wave- this of course suggest additional processes are in play.  Wave clouds can form over the course of a few minutes and like cloud caps can last for hours or even a day or two.  The vast majority of the time these clouds form over the higher summits of the Cascades but one or twice over the course of the summer conditions are ripe for lenticulars to form for hundreds of miles up and down the Cascade Range (clearly visible in satellite imagery).  Many lenticulars form during the passage of an upper level weather front which in turn produces the aforementioned stability and wind profiles.

So what does this all mean to climbers' high on Rainier or any other peak that is prone to generate cloud caps and lenticulars?  Two things should come to mind: wind and lower visibility.  There is not magic windspeed at which cloud caps or lenticulars form: in general minimum speeds are on the order of 25-30 mph.  Let me stress that that figure is a minimum, which you should interpret to mean that in many cases the winds are significantly stronger, sometimes far too strong to climb into.  Secondly, these clouds often produce whiteout conditions due to the production of new snow (occasionally water droplets), or the re-suspension of snow from off the upper mountain.  In the winter and spring it is also not uncommon for rimming (freezing of supercooled water droplets) to occur which will escalate the danger factor considerably.  These clouds are very common in winter however there is so much intervening cloud cover that its uncommon to see them.

Stacked lee wave-July 21, 2017

Are cloud caps and lenticulars predictable? Yes and no.  Don't expect to see predictions for these in your favorite mountain weather forecast or the REC forecast we use here on the hill.  Why? The state of the art is slowly improving however the use of a high-resolution weather model does not guarantee a quality forecast of this nature because the outcome is very sensitive to the initial conditions.  Recall that there is a fine balance between the water vapor content or air and the degree to which it is forced upwards.  If the model(s) is off a little bit in moisture content- it will produce a cloud when it should not and neglect one when it should.

With that being said there have been many modeling attempts in conjunction with field studies that have looked at the generation of lee wave clouds (and downslope windstorms in particular).  The results of these studies have shown there is some skill in forecasting (or hind-casting), however researches have almost always added smaller-scale data which is not readily available in the day-to-day forecast models.  In our specific case, one would be tempted to look at the vertical cross-section (X-Z coordinates) which runs through Rainier from the GFS-WRF model and make a forecast.  That would certainly be a good starting point, however a considerable amount of additional data and expertise would be needed in order to produce a relatively accurate wave cloud forecast each day.  In other words, a forecast is possible but it would take a lot of additional resources ($$) which no one wants to pay for.
July 22, 2017

Cloud caps and lenticulars make for some memorable scenes when viewed from below but at times produce some challenging or even dangerous climbing conditions.  In general these clouds are associated with moderate to strong winds and lower visibility or even whiteout conditions. As noted above, a wide spectrum of cloud types are possible; from gossamer like features wafting just above the summit to monster clouds which envelope the entire upper portion of the mountain to a series of downstream lee wave clouds.  At times one type will transform into another over the course of to 30-60 minutes.  If you're going to climb into one of these clouds give it some serious thought beforehand.  If one of these forms around you give some serious thought to descending before conditions deteriorate. Only you know your own abilities, so choose wisely.

E/W and DC Merge!

The "merge" has occured and has been leading to some confusion on the upper mountain.  Climbers on the Disappointment Cleaver Route from Camp Muir merge with climbers on the Emmons/Winthrop Route at about 13,800 feet.  USE CAUTION WHEN DESCENDING THAT YOU TAKE THE CORRECT ROUTE.  We've already had climbers who ascended from Camp Muir arrive at Camp Schurman wondering where their tent was.  See map below. 
The old DC route that hasn't been climbed in a couple days is in purple.  The new DC route currently being used is in light blue.  The Emmons/Winthrop Route is in Brown.  Again, be sure to notice when the climbing routes split.  It's easy to put it in auto-pilot on the way down and take the wrong turn.  


Both the new DC route (light blue) and the Emmons/Winthrop are still seeing lots of climbers and climbers have been making it to the summit from both sides.  The routes are longer than they were earlier in the season, so be prepared with lots of food and water, plus get an early start.  Ski season on both of the standard routes is over.  See previous posts for more beta. 


Little Tahoma

Rangers did a patrol out to Little Tahoma from Camp Muir this week.  They found favorable conditions, but crossing the Cowlitz and Ingraham Glaciers to get there will become more difficult as the crevasses continue open up.  The rocky 4th class scramble from the Ingraham Glacier over to the Whitman Glacier is still loose and a challenge both to find solid footing and place any protection.  The upper Whitman Glacier has large sun cups which has made for more secure descents.  The last snowfield on the upper face of Little Tahoma has melted enough so that climbers can just walk on the scree to the summit ridge. 

Track Log for the

While Little Tahoma has "Little" in the name, it's still as challenging as a climb on the standard routes on Mount Rainier.  There's the potential for rock fall, crevasse falls, and dangerous moats between the rock and melting snow.  Be prepared for a full alpine climb and long days when attempting this mountain.  It's just as tall as Mount Hood with steeper slopes.  

The Lower Ingraham Glacier Crossing


Northwest Side Conditions - July 26, 2017


As can be expected after weeks of warm temperatures, the mountain is in late season condition. Rockfall has been commonplace at all times of day and night. Gaping bergschrunds and heavily crevassed glaciers pose navigational and approach challenges on nearly all of the non-standard climbing routes.

View from the lower slopes of Ptarmigan Ridge.

Recent patrols on the north and west sides of the mountain have shown that most routes on these aspects are out of condition for the season. Particularly, attempts on the Tahoma Glacier, Sunset Ridge, Ptarmigan Ridge, and Liberty Ridge should wait until next year. 

-->

Liberty Cap, Point Success, and the Tahoma Glacier.

Looking down the Tahoma Glacier. Puyallup Cleaver is on the right.
--687

Monday, July 24, 2017

Emmons Glacier - July 23, 2017

The Emmons-Winthrop Glacier. July 23, 2017
The Emmons-Winthrop Glacier route continues to see significant traffic, even after weeks of warm temperatures and snow melt. The route itself is largely unchanged from past weeks, with minor re-routes around widening crevasses. As mentioned in this blog, the Emmons and Disappointment Cleaver routes are currently merging near the bergschrund at 13,800'. Be sure to take the correct track on your descent, to avoid accidentally walking to the wrong high camp!

Ascending the Emmons Glacier above The Corridor.
 There are numerous thinly bridged crevasses on the route, particularly above 12,000’. The track is well established in this section, but beware that as these cracks open the existing track might lead impassible crossings. Remember that jumping over crevasses posses a high risk of personal injury and crevasse fall; if you feel that a jump is necessary to cross a crevasse, look around in both directions for a narrower crossing location where it is possible to step across. There is rarely a reason to take flight while traveling on glaciers!


Emmons tracklog on July 23, 2017

With warm temperatures and poor overnight freezes, the likelihood of crevasse falls is also increasing. Beware that slushy conditions can result in slippery footing and reduce the strength of snow anchors. Start your ascent early, climb efficiently, and try to be back at high camp as early as possible. Warm temperatures have also contributed to the loss of multiple tents into crevasses at Emmons Flats -- anchor tents with secure anchors at least one foot deep to reduce the risk of having it blow away into a crevasse.


-->
Finally, beware that the bootpack and glissade tracks on the Inter Glacier cross several crevasses. Some of these holes have thin snow bridges that aren't readily apparent on ascent or descent. Always evaluate glissade tracks and their runout before starting your descent.

Glissade track over a thin snowbridge on the Inter Glacier.

--687

Sunday, July 23, 2017

Kautz Glacier Update

GPS track of the Kautz part of our climb
Its been another warm and busy weekend on Mt Rainier. Taking advantage of the nice weather two climbing rangers made another climb of the Kautz Glacier route over Friday and Saturday. Conditions were largely unchanged from the last post on 7/20.(Previous Kautz Report)  The access from Paradise across the Nisqually and up the Wilson gully is becoming tenuous and climbers are recommended to to access the route from the Comet Falls Trail head.  Running water is available just above the Castle at 9600ft and can also be found at Camp Hazard. Climbing on the Kautz glacier is still snow all the way, but ice is starting to show through. With warm weather predicted to continue its likely that the Kautz will become true ice climbing in the coming weeks. Travel on the upper Kautz is a bit of a wander to end run a few large crevasses before getting on top of the Wapowety cleaver at 13,200ft. Good travel to the summit from here after you pass a serac line just off the Wapowety.
View of the Kautz Glacier from Camp Hazard.


If you are planing on a carry over climb and descending the DC, keep an eye on the Latest posts for that routes conditions. Its is currently in flux with a few possible ways to go.


Enjoy the sunny weather and get out climbing.

Sam Luthy- 682
Steep snow on the upper Kautz. Good climbing but protect as needed.

Saturday, July 22, 2017

Inter Glacier

The Inter Glacier approach to the Emmons Glacier route is currently very straight forward.
The trail is completely dry to 6,700 feet.  Transition to snow is fairly abrupt.  Expect snow coverage to thin quickly.  Skeletal ice will start to show and make the consequences of slips and trips more severe.   The possibility to pop through into a crevasse exists on the Inter Glacier with out warning.  We recommend roping up when traveling on glaciers. 

The main uphill track is currently very consistent and goes directly up the middle of the basin in fairly hard pack snow. Concurrently, the glissade track goes right down the middle.  If deciding to glissade on your way down know that rocks and cracks will continue to appear directly in the middle of the track in the next few weeks.  Also expect snow to become less and less user friendly for both the up and the down.

Crevasses are beginning to open up between 8 and 9 thousand feet.  From there the route veers directly south to the ridge towards Camp Curtis. The campsites here are dry.

Overall conditions are typical for this time of year which means things are changing daily.

Thursday, July 20, 2017

Late July Kautz Climbing

The lower Nisqually Glacier is beginning to break up quite a bit and making travel fairly difficult through the Wilson Gully.  We recommend taking the trail up to Comet Falls and up through Van Trump Park.  This approach involves no glacier travel, crevasse crossings and the flowers are just starting to poke out.  Sounds pretty good right?

Looking up from Van Trump

Upper Kautz step
Running water can be found at both the Castle as well as Camp Hazard, but expect these flows to be lessened or even frozen in the early mornings or on cooler days.

Looking down below the second step.
The step off the cleaver and down onto the Kautz Ice tongue is fairly short currently.  Only about 10’ and can be easily down climbed.  Just note that there is a sizeable steep snow slope below you, so utilizing a rope for this may be a wise idea.

Secons step looking towards climbers left and the Kautz Cleaver

The climbing on the tongue itself involves a fair amount of snow, granted, this snow is highly featured penitents, but snow none the less.  Ice can be found far climbers right and easily accepts screws and good purchase with your tools.  The lower step involves about 2 pitches of easy climbing, followed by a short section of steep snow walking.  The second step involves about 3 pitches.  Both these steps can be easily simul-climbed depending on your comfort level and ability.

Looking down from the  top of the Second step
The climbing above the tongue involves navigating around a couple crevasses, although a couple of them are widening and the plugs, thinning.  In time, a few of these may warrant a belay to cross safely.

Once on the Wapowety Cleaver, you will see that the crossing onto the Upper Nisqually Glacier involves maneuvering a hollowing section.  Again, this may warrant a belay.  Large cracks are beginning to open up on the Nisqually and the plugs are beginning to fall through a couple of them.  This said, navigation is still fairly straight forward from Wapowety Cleaver to Columbia Crest.


Looking up , just below the Wapowety Cleaver.
Looking up towards the Upper Nisqually 
Whether you plan on down climbing the Kautz or descending the DC, plan to bring gear to safely get from the top of the ice pitches back to Camp Hazard.  Crevasses may impede travel upwards or weather may move in and force you to descend.  Either way, plan to bring equipment to rig a V-thread and bring extra cord to leave as tat.  The last thing you want is being forced to down climb technical ice because you decided to leave materials back at the car.